How to Mend Clothing
Mending clothing is a great sustainable option. It extends the lifetime of the item and saves you money.
You need to learn a couple of basic hand sewing techniques and grab a couple of sewing tools like needle and thread to get started.

The best thing about mending clothing instead of throwing the item out is that you are repairing and reusing it and saving the clothing from going to landfill.

Types of Mending

Fixing holes or tears
To fix holes and tears, attach fabric behind the hole to strengthen the item. You can use a special fabric called interfacing for a subtle mend or you can make the mend a feature by using a scrap of contrasting fabric underneath the tear.
Read more about what stitches and techniques to use here:
How to repair stains
Removing a stain is another way to revive your garments and save them from landfill.
Firstly act quickly so it’s easier to remove.
1. For a large stain soak the stained item in a solution of 50% vinegar and 50% water
2. Rinse the item in cold water
3. Wash the item in cold water with laundry liquid and water
4. Don’t dry the item until the stain has fully come out.

For a small stain use a mix of vinegar, washing up liquid or lemon with water
Gently rub on the stain until removed
Rinse with cold water before putting it in the wash
Baking soda can also lift tough stains from garments
Make a paste with six tablespoons of baking soda and 1/3 cup of warm water
Rub it in the stain and leave it until the stain has lifted
Wash as normal
Try these methods and your item will be like brand new. It’s you wanted to be creative you could paint a design over the stained area with fabric dye or iron on designs.
Need advice on specific stains check out this link for eco friendly stain removal:
https://www.savemoneycutcarbon.com/learn-save/how-to-remove-stains-in-an-eco-friendly-way/

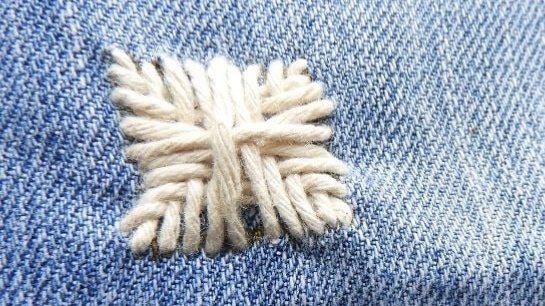
Visible mending
This is a fun and practical idea. Rather then fixing clothing so you can’t see the damage, visible mending makes a point of showing that the item was damaged and repaired.
Check out more viable mending on this link:
https://blog.shopmartingale.com/quilting-sewing/mending-is-trending-give-new-life-to-old-favorites-with-visible-mending/

It’s an opportunity to get creative and add something unique to the item. Why not try stitching with a contrast colour to make the item pop.
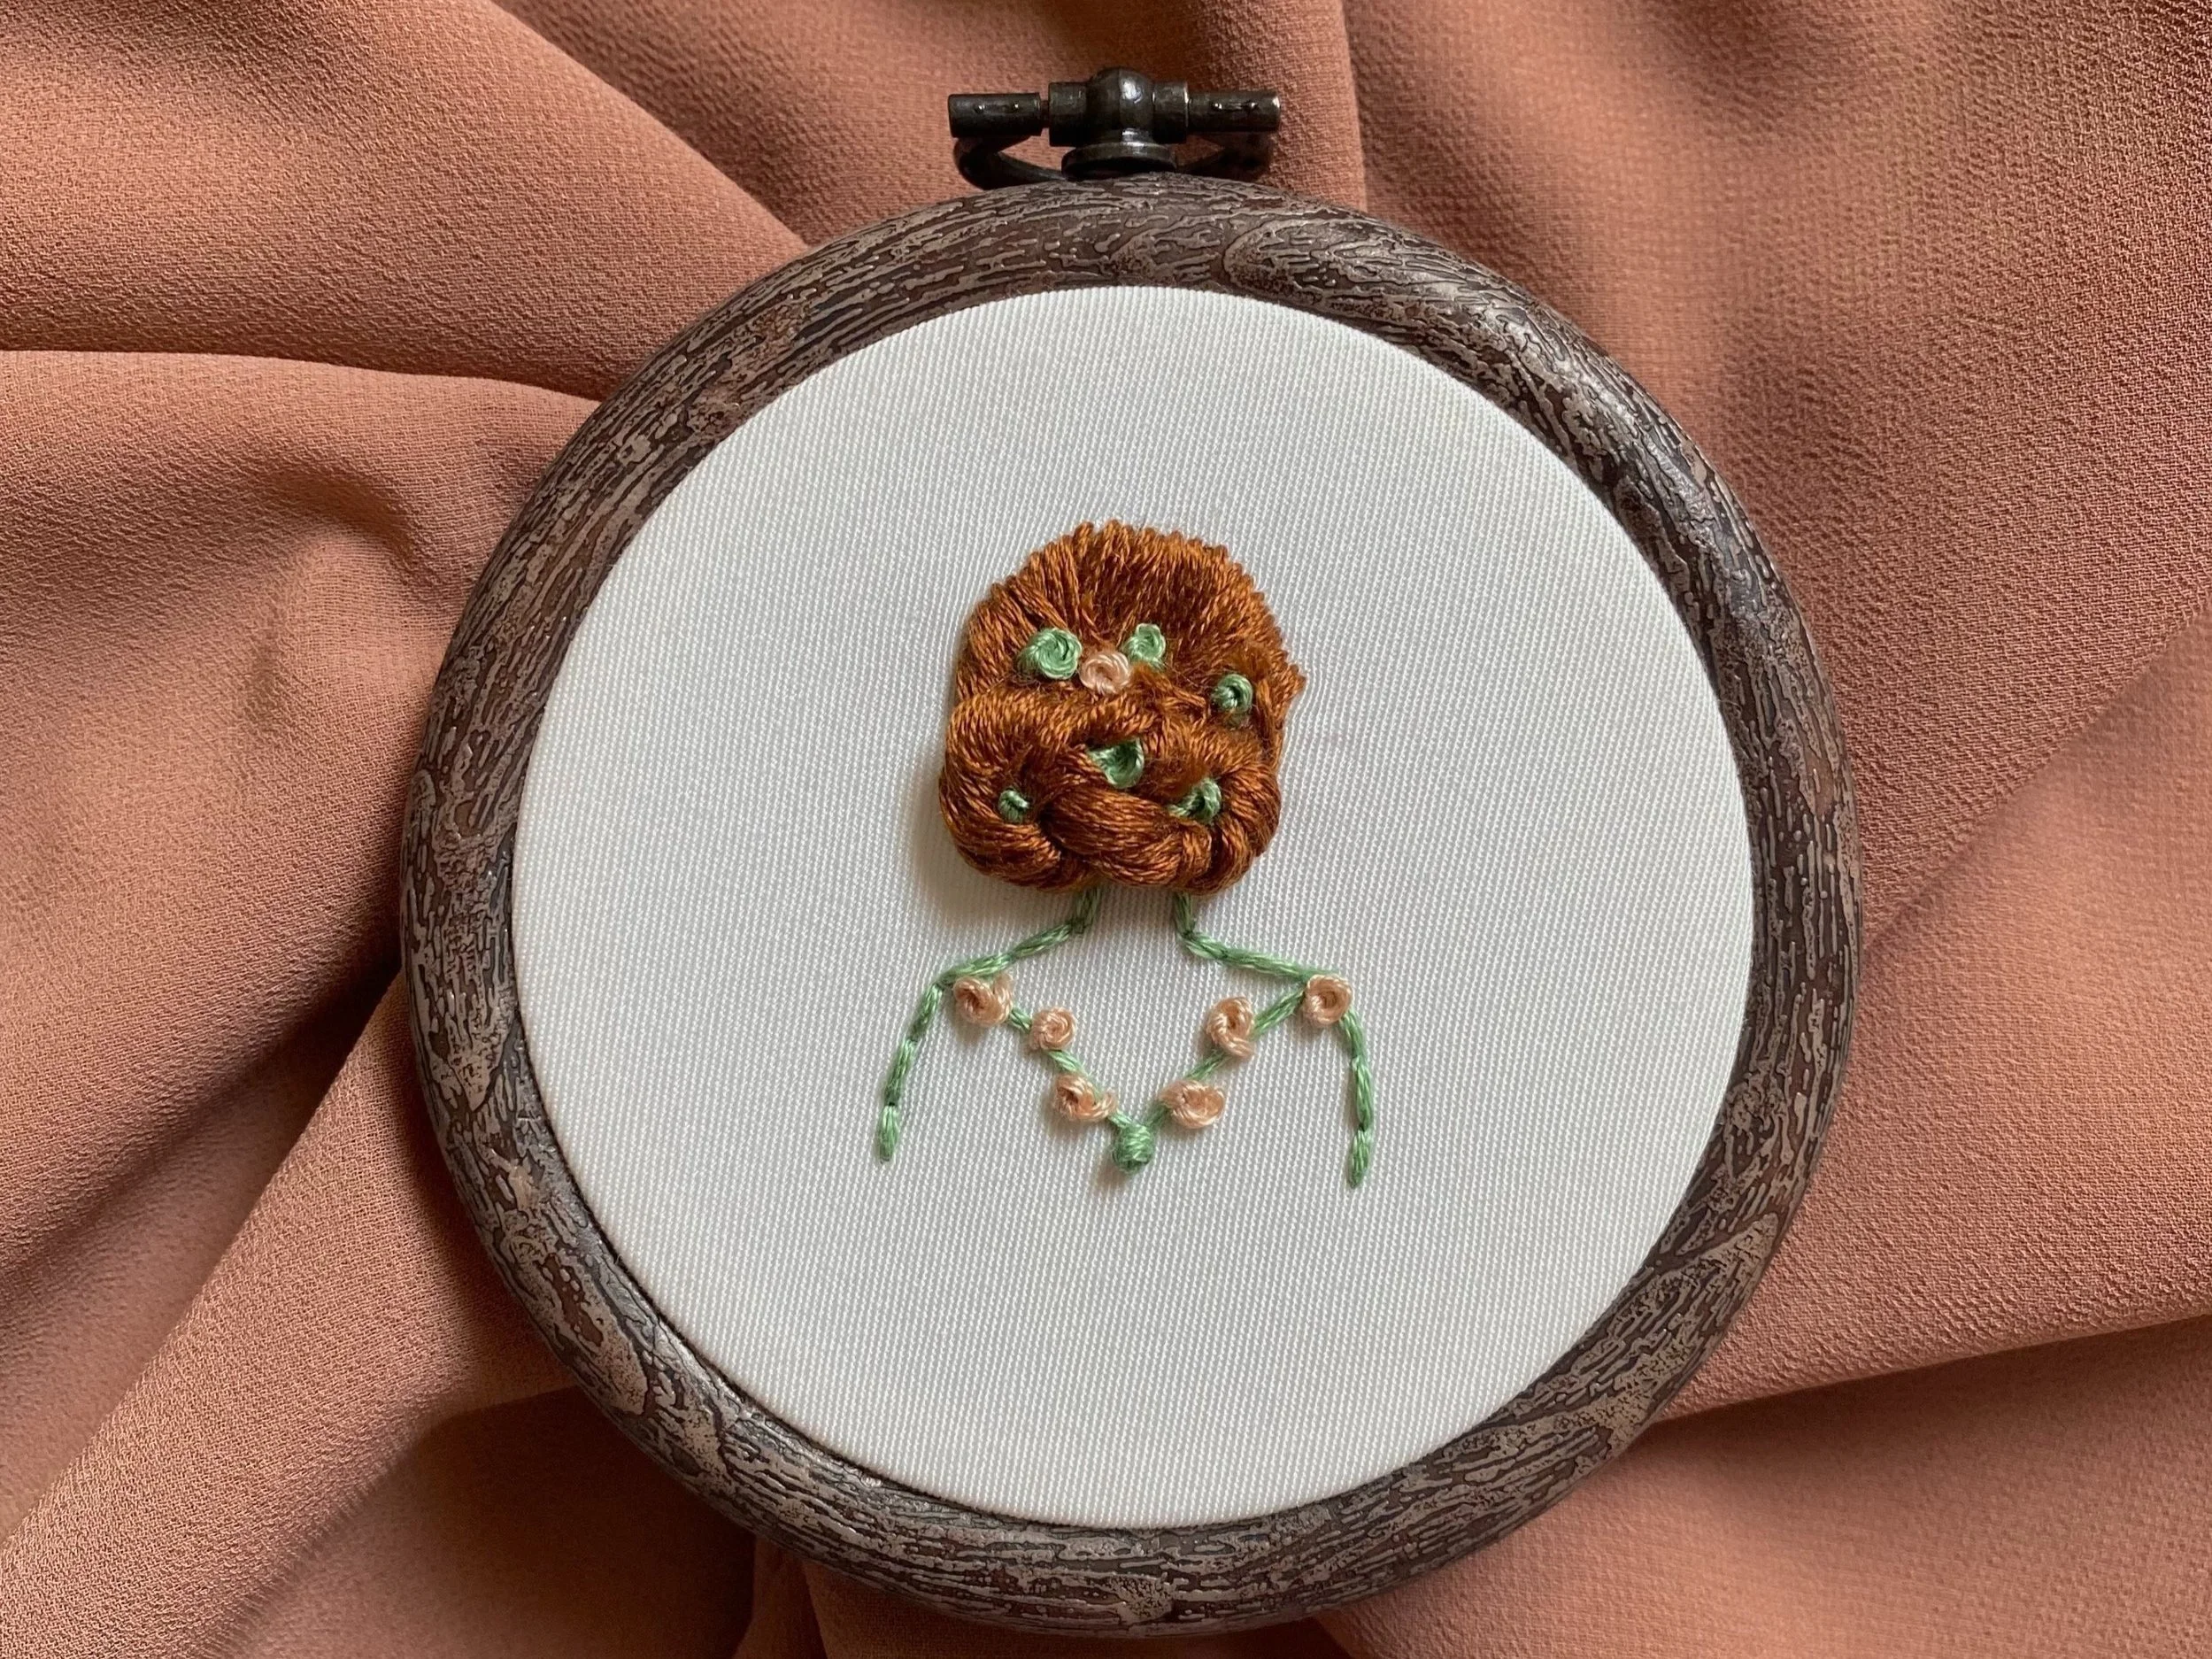
You can also add embroidery designs onto the garment by fixing an embroidery hoop around the damaged area and stitching your design on-top.

Patchwork
Make clothing more stylish and unique by adding your own stamp to the item. Try stitching on coloured or patterned patches or different fabrics to add texture. Go for a random pattern or create a design. You can buy already designed patches to sew on.

Japanese techniques
Wabi Sabi
‘’A Japanese aesthetic concept that finds beauty and serenity in objects, landscapes, designs, etc that are simple, Imperfect and impermanent; it’s the philosophy of wabi-sabi, which delights in the tarnish on an ancient silver bowl and the old uneven cobblestone.’ Dictionary.com
Boro Stitch
‘Boro is essentially the practice of using a simple running stitch (a sashiko stitch ) to reinforce a textile item using spare or would-be-discarded scraps of fabric. It is a practice that grew out of necessity in medieval Japan, and has evolved, four centuries later, into a distinctively gorgeous textile artform’
https://indigoniche.com/2018/08/30/boro-stitching-introduction-history/

Sashisko
‘Sashiko is a form of decorative reinforcement stitching (or functional embroidery) from Japan. Traditional sashiko was used to reinforce points of wear or to repair worn places or tears with patches.’
https://craftatlas.co/crafts/sashiko
These all embody a more historical circular movement using these techniques today can help the fashion industry move away from waste - fashion been turned into landfill.

History
Make do and mend
From June 1941 - 1949 buying new clothing in Britain was rationed. Make do and mend was born as part of a government campaign urging people in the Second World War to repair and reuse their existing clothing.
Here some make do and mend top 10 tips:
https://www.iwm.org.uk/history/10-top-tips-for-winning-at-make-do-and-mend

Getting Started
First ask yourself whether the item is worth repairing. Do you still like it? Is the rest of the item in good condition? Is it an heirloom? Is it worth the time and effort to repair ? If the answer is yes, then carry on!
Choose what mending techniques to use
Here are a few tips to help you decide which techniques to use for your mend

What effect do you want?
Do you want an invisible repair or to make a feature of it? For smart or work clothing you may want to go for less obvious repairs. For casual clothes, you might want to get creative.

What Type of fabric are you repairing
Wool – darning technique
Woven fabric – patches/ interfacing/ reinforcement stitches
Delicate fabric - use lightweight fusible interfacing under the tear and iron on, you can also do invisible stitching by using a thin small needle and the right colour and size of thread
Lace - stitched across the ripped area with a needle thread making sure it resembles the lace pattern make sure the stitches are loose if the weave is loose or tight if it’s a tight weave

Type of Damage
Damaged seam – invisible repair to seam
Small tear – interfacing, patch or japanese visible technique
Small hole -stitch together with a motif design on top or a contrast thread or thread of the same colour
Large hole – patch
thinning fabric – patch on the inside or outside of the garment
Where is the damage?
If it’s in a place that gets a lot of wear, you probably need to reinforce the area with interfacing or a fabric patch, try the Boro stitching technique.

Things you may need
You can buy most of the basic items you need in a supermarket or grocery store. For things like interfacing, and embroidery hoops, visit a haberdashery store or online shop.
- Needle
- Pins, pincushion
- Sewing scissors
- Scraps of fabric
- interfacing
- Embroidery hoop
- Thimble
- Darning mushroom
- Thread
Learn a few basic stitches
Here is a great link with 10 basic hand stitches you need to know to get you started
https://theinspiredsewist.com/10-basic-stitches-you-should-know/

Get inspiration
Look for mending ideas online, like on Pinterest or in magazines. See what other people have done and how you can adapt it to your style
Get some exciting tools & haberdashery
Why not get some exciting colour thread to play with. Get creative and choose a colour that contrasts with the garment to show visible mending
Shown below with darning a sock, click on the link to find out how
http://www.customwoolenmills.com/blog/how-to-darn-a-sock-using-a-woven-repair/

You could also try appliqué - add scraps or fabrics on top of the clothing making it into a design, like a small flower or motif that changes the garment into something more stylish and interesting.
Start stitching
Now you can start mending your clothing, don’t worry if there are mistakes. Just plan what your going to do and take your time. Be proud that you’re being creating and sustainable and saving your clothing from landfill.
